So you have an internet connection which you need to share with others.You might be knowing that the way to do that is through WiFi hotspot. While there are many third-party software giving you the ability to do so , they may not be free, may not share all possible types of connections(Broadband,Ethernet or maybe WiFi itself!) or do not give you the customizability you need.Fortunately Microsoft comes to our rescue.Without installing any other software it is possible to create a WiFi hotspot in very simple steps.
- Open notepad or any other text editor and type the following two lines:
netsh wlan set hostednetwork mode=allow ssid=YourWiFiName key=YourPassword
netsh wlan start hostednetwork

- Save the file as “WiFi.bat” or any other name as you please but of “.bat” extension.
- Create a shortcut on the Desktop of your batch file.
- Go to Properties->Advanced and check the box labelled as “Run as Administrator”.
- While you are at it you may add an icon to the shortcut file as well.It looks cool and gives a professional feel.
- Simply run the file, there would be a blink of command prompt which should look something like this:

- This means that the hotspot has started but it still does not have internet access as you have not specified which existing connection it must share,you can confirm this by going to Network and Sharing Center which should look something like this:
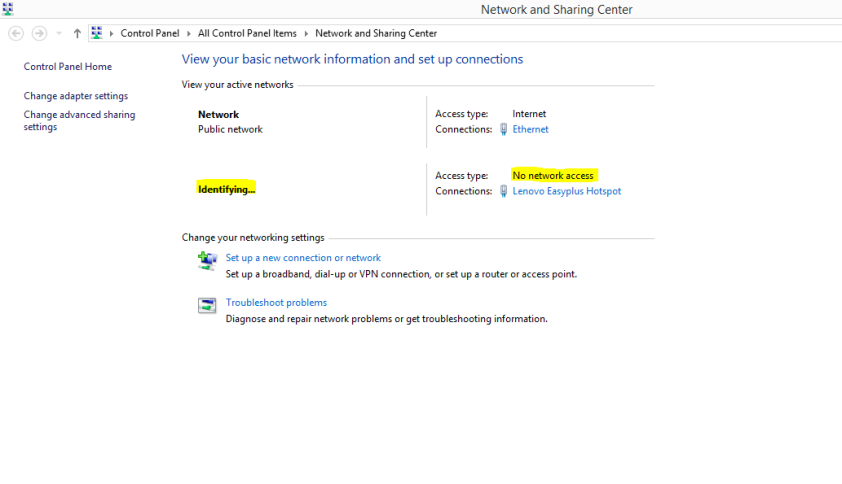
If you wait for some time, it should go to something like this:
- In my case I have my internet access from Ethernet so I will need to share that with my WiFi hotspot,but for any other connection also the steps would remain same.
- Select Ethernet which is highlighted in the above image to open its settings.Click on the Properties tab then from the tabs on the top select Sharing.Check the box labelled “Allow other users to connect through the computer’s Internet connection” and then from the drop down menu select the same adapter which comes next to the name of your WiFi hotspot . In my case it is “Lenovo EasyPlus Hotspot”

- Having done that your Network and Sharing center should look something like this
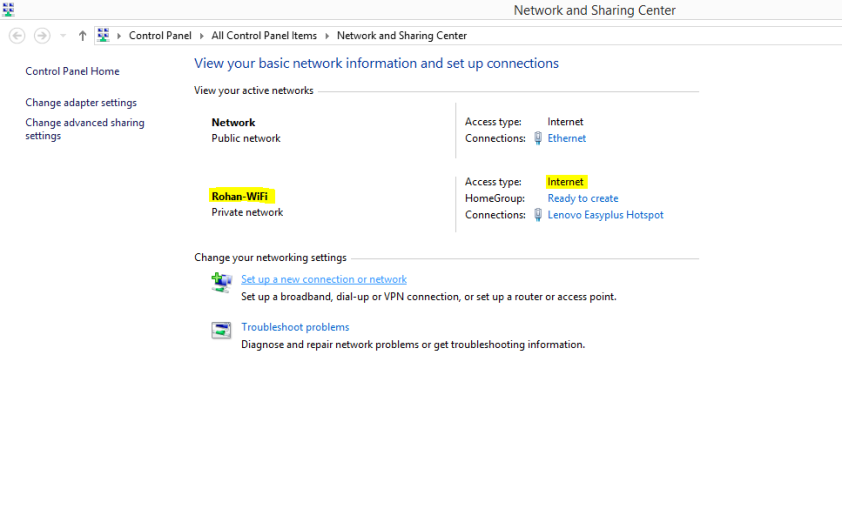
- Voila! Your hotspot is created and ready to be used.Just connect it using the custom ssid(User ID) and key(Password) you created earlier.
- To use the hotspot next time just double click on the Shortcut, no need to do the sharing each and every time.


Thanks! Hope it helped.

in the ethernet connection, the connection type is given as no internet connection, it may be due to proxyless conn. or something, but it’s not working
LikeLike
Your comment is a bit ambiguous .. Can you post a screenshot here then I may be able to help.
LikeLike
I made the batch file and ran it as administrator but nothing is showing up in the network and sharing center.
LikeLike
Are you a freshie? If so, contact me on Facebook I would be able to help you better from there.
LikeLike
Simply ..grrrrreatttt …!
LikeLike
Finally, after circling figure out how to share the internet connection from my laptop (mobile broadband connection) using the hotspot for my others gadget device.
I’ve tried using the default application of Lenovo ThinkPad (Access Connections) but it’s always not working well 😦
Your methode is very quick, easy and simple 🙂 Thanks
But there may some additions that should be doing before I enjoying the internet connection on my other device, because some case that I’ve experienced is a hotspot connection working but no data internet -_-.
The trick is:
– After the device connected with the hotspot connection, if there looks no data connection, just set manual the IP address to static and input manually the IP address as same as the IP address of your PC or laptop (except the last number. example: 192.168.137.x) and setting the DNS as same as your PC or laptop DNS.
– Then enjoy your hotspot 🙂
Hope your understand what I’m saying above,
And very sorry for my bad english
(I’m Indonesian people)
Thanks
LikeLike
There would be a problem in setting your IP address to static – if you change your location or the source of internet, internet won’t work!! So I think this method should be used very very carefully or not at all(the hotspot works just fine without that)
Nice to know the blog is getting hits from Indonesia!
LikeLike
Thanks Rohan.. This works fine.
But there is an issue. It works fine for around 5 minutes. and the internet stops working. It starts working again when i disconnect and reconnect to the Wifi network. I’m using android phone.
So it keeps getting disconnected every 5-10 minutes..
LikeLike
lenovo easyplus hotstop is not showing in sharing tab dropdown. my wifi shows no internet access wt to do?
LikeLike
Can you post some screenshots, that will help me in debugging. Thanks!
LikeLike
lenovo easyplus hotstop is not showing in sharing tab dropdown. my wifi shows no internet access wt to do?
LikeLike
go to device manager >click on network adapters> select the wifi adapter which you are using then > right click on it> click on uninstall . & restart the pc.
i tried this & this method worked successfully & now i am able to see my hosted network in drop-down tab
LikeLike
In my case it was Lenovo Easyplus Hotspot, as I have mentioned on the blog it might very well be Local Area Connection 3 or something else for you. Say if you WiFi has connection port as “X” then in the dropdown menu go select “X”
LikeLike
I love your work. Great solution.
LikeLike
Hi Rohan. Thanks for the tutorial. I’ve lenovo easyplus hotspot too. I’ve shared my ethernet connection as you’ve shown. A hotspot is being created and my android phone gets connected to it. The problem is that there is no internet access on the devices connected to the hotspot created. Can you help me out please?
LikeLike